In recent years it has become increasingly popular to own your own home server. Whether it's for personal private data backup, home automation or media storage more and more people are looking into solutions that fit their own personal needs. This guide will cover step-by-step how to go from nothing to a fully functional media and data backup server.
Overview
"Why do we want a media server?" might be the question your wife asks. "How dare you" might be your response. Depending on the strength of your marriage you may or may not want to proceed with this guide. I warn you, once you get into this Linux stuff there's no going back.
In order to answer your other half's question you might say "One of the more popular uses for a home server is to store digital media such as music, photos and video. A media server, allows the streaming of this media throughout our lovely home". The idea is then that your good lady see's the light and gives the necessary financial approval to proceed!
The advent of the Raspberry Pi has seen a massive surge in 'normal' people taking up tinkering and playing around with Linux. This is great. One of the great advantages of using a small home server (pre-built or custom made) is that they are a lot more suited to the tasks of being either always-on as well as running automated tasks. Finding one with a low power overhead and small form-factor means you can have it running 24/7 without worry.
Keeping that in mind, choosing the right server for your own personal needs is important. There are many different ways to go about setting one up: build your own; buy a ready-made barebones server; or get a NAS (if media storage is your game).
Step 1: The Server
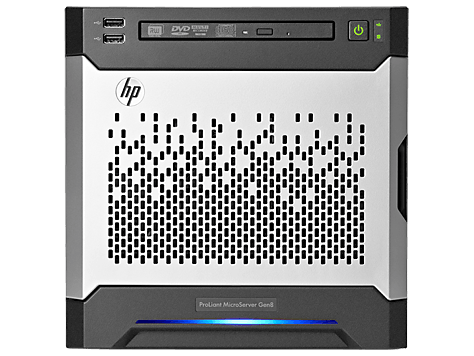
Because this is a beginner's guide, I'll be using the HP ProLiant MicroServer Gen8 G1610T as my server of choice. This particular micro server is an excellent starting point due to its cheaper price and decent processing power. It has a low energy footprint with its 150W PSU, mild processing power with an Intel Celeron 2.3GHz Dual Core processor, and 2GB UDIMM ECC RAM as standard. Modest specifications but enough to get you started. It's also very easy to switch out the Celeron and replace it with a more powerful Xeon should you wish too, and its RAM is extendable to 16GB. On the back, you'll find 2x USB 2.0 and 2x USB 3.0 ports, 2x gigabit ethernet ports and an iLO port.
Step 2: Storage
The amount of storage you require is directly affected by your use of a home server. With the exception of buying the server itself, buying the storage for it can often be the largest expense in the build. Knowing which type of hard drive and how much storage you actually need is important to consider. For example: if your usage is media storage and file serving, you will likely want a robust hard drive that is designed for quick read access, with relatively infrequent writes. If your requirement is a little more heavyweight (perhaps you're starting a home business) and you want to use your server for everything from data backup to web serving, you'll want a drive that is designed for such heavy use.
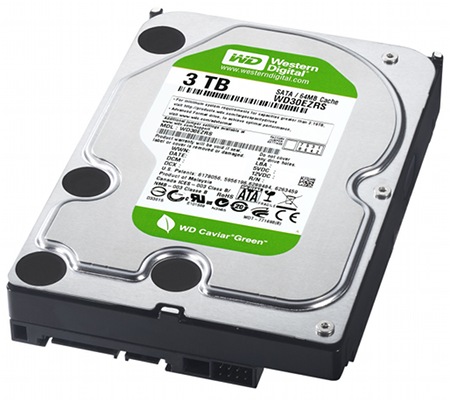
Keeping that in mind and sticking to the theme of building a home media server, I would highly recommend Western Digital Caviar Green hard drives. They have been specifically designed for moderate desktop use but these are perfect candidates for long-term media storage within a server. However, if you're more interested in a heavily networked server with RAID (not specifically talked about in this article), then Western Digital Red hard drives may be more suited. Unlike WD Greens, WD Reds are specifically tailored to RAIDed systems due to the way they handle sector reallocations. Hard drive brand / type is a bit like religion and no one brand is ever the 'right' choice but some are more right than others. A useful resource is this study conducted by Backblaze to determine long term drive reliability.

The Gen8 itself is compatible (based on specification sheets) with at most 12TB of storage (3TB per bay). (Ed. There is no logical reason why a larger drive would not work though).
Installing the operating system boot disk
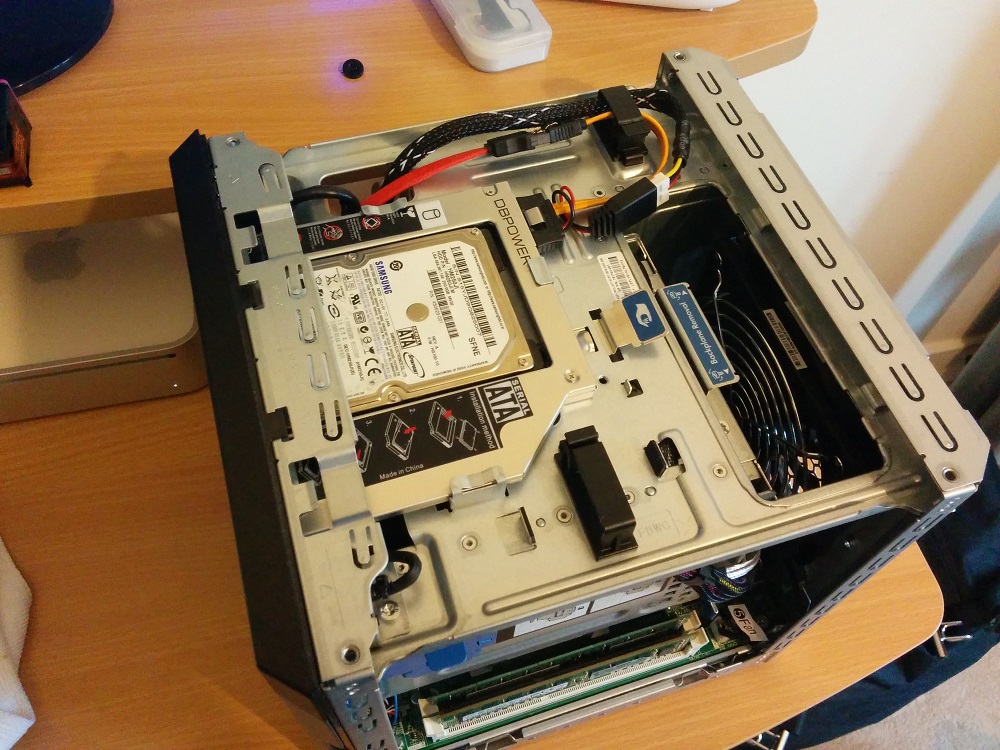
This setup makes use of the empty ODD bay for the OS drive. Separating the OS from the storage allows you to switch out data drives at a later date without worrying about compromising any data that might be shared on the OS drive.
To install the OS HDD, you’ll need an adapter that allows usage of the top bay. You’ll need a 9.5mm SATA to SATA caddy and 50cm SATA male to female cable with a SlimSATA power cable to connect it to the motherboard. This particular adapter doesn’t have a faceplate, so in light of this, you could snap off the clips on the original faceplate, sand down the back, and glue it on to the front. Having done this myself, it does work rather well.
Step 3: Choosing the right drive controller
By default, the Gen8 has its Smart Array B120i RAID controller enabled. This particular guide does not go through a RAID option (purely a personal preference from my part) so you’ll need to switch the primary controller from this to the AHCI Controller in the BIOS.
To do this, boot up the server (with or without the disks already installed -- it doesn’t really matter at this point): F9 -> System Options -> SATA Controller Options -> Embedded SATA Configuration, then select Enable SATA AHCI Support. Hit ESC until the option to F10 and Save is displayed.
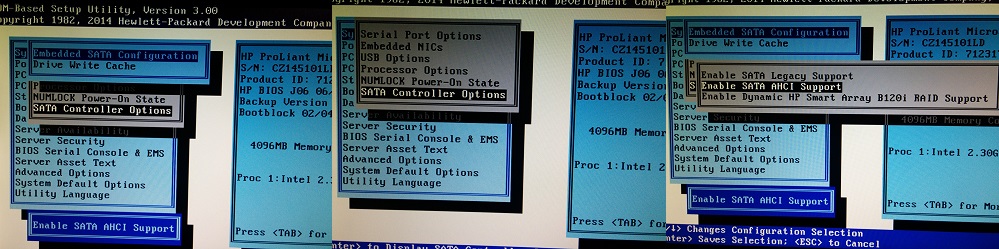
Now the server’s AHCI controller has been enabled, allowing individual access to each drive.
Step 4: Installing the OS
Whether you’re coming from a Windows or a Linux background, I’d highly suggest using a Linux-based operating system on your server. Linux is very well suited to server architecture due to its low overhead and virtualisation support.
Ubuntu Server is a very good starting point thanks to the widely available documentation and community support. If you wish to use another distribution, that’s absolutely fine (Arch Linux is another favoured distribution around these parts) but this article will be assuming the base operating system is Ubuntu.
I recommend Ubuntu Server LTS (14.04.2 at the time of writing) due to its extended support by Canonical, as well as its lightweight overhead and preinstalled packages. The Server variant of Ubuntu is perfectly suited to this situation as there is no GUI preinstalled, keeping things nice and clean. Should you wish to install a desktop environment (GUI) something like the MATE desktop is a good choice.
The installer is relatively simple — asking you for default login credentials, a device[host] name and which drive to install the OS onto. Make sure you select the HDD in SCSI5. I’d also recommend selecting the OpenSSH option during installation as I find it much easier to work on a headless server (display via VGA isn’t overly pleasant). Do not install the data disks before this step if you value your data!!
Selecting the right boot disk
By default, when any number of disks have been installed into the Gen8, the AHCI controller automatically boots into the disk in Bay #1. Unfortunately, this is a limitation with the stock BIOS provided with the Gen8 and there is currently no direct workaround to this problem. Ubuntu Server’s main installer allows you to install the GRUB to another disk, more on that in a minute.
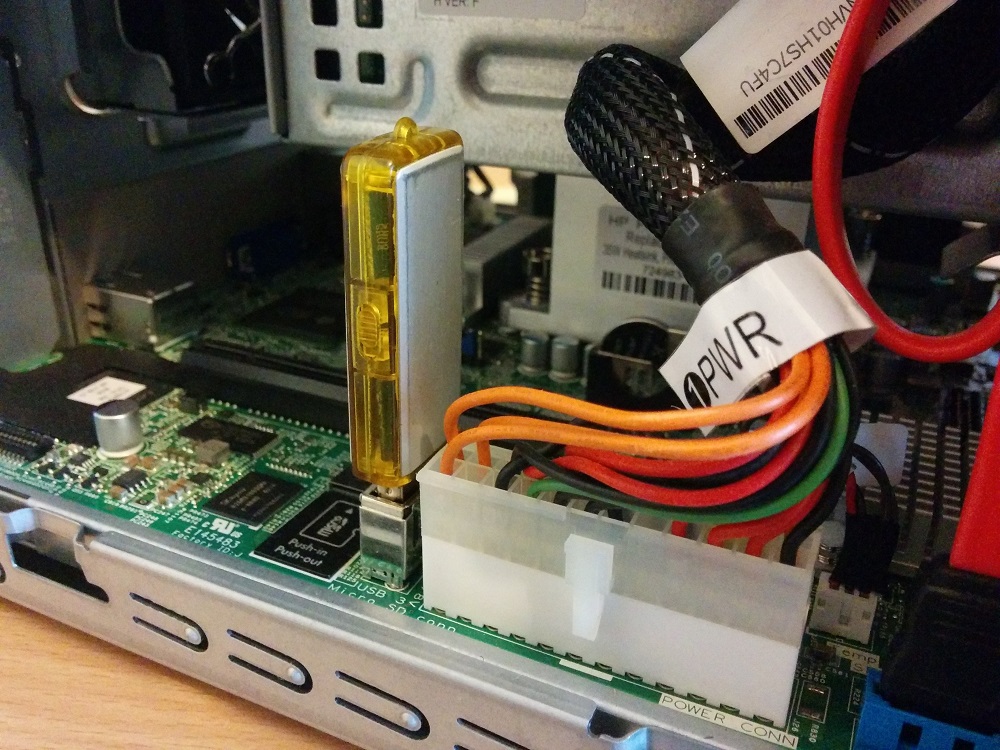
The AHCI controller favours USB boot disks over the primary drive, and as such, we can use this fact to install GRUB on an internal USB stick and use that as the boot disk instead. When the option is made available to you in the installer, select the USB stick as the disk to install GRUB to. At this point, depending on how Ubuntu decided to see each disk, it is likely that the USB stick is under /dev/sdf, however this can vary between boots.
If you skipped this step during the installation of Ubuntu and you need to fix the GRUB to boot from the USB stick, follow this guide (written by Alex).
Installing the data disks
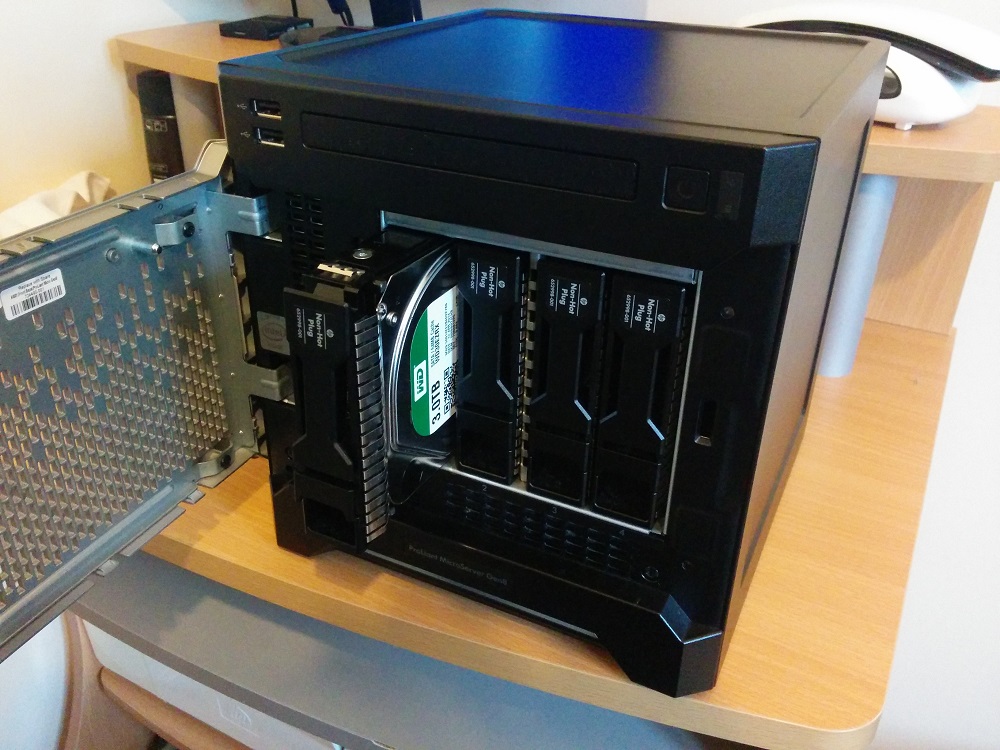
Adding the HDDs to each of the bays is relatively trivial. The Gen8 model’s 4 bays are split — Bays 1 and 2 SATA3 6Gbps, while Bays 3 and 4 are SATA2 3Gbps. Generally, you’re not going to notice these kinds of speed differences if your primary use is streaming. It is important to note that the hard drives must face to the right when being inserted (see picture below).
Step 5: Post-install disk management
Assuming the disks in each bay are all brand new and contain unallocated space (i.e. no partitions), you’ll need to create a primary partition on each.
The first option is to use a LiveCD (Ubuntu Desktop or GParted) to run GParted and format each disk.
The second option is to use the parted command line tool. This is the option I used as I needed to update the partition table to gpt (guid partition table) on each drive (by default they had a dos partition table). The DOS partition table doesn’t support drives larger than 2TB, therefore GPT must be used.
Format your disks with parted
First, identify the disks you need to format:
sudo fdisk -lThis will list all disks on the system. The OS drive should be under /dev/sdf, so take note. At this point, you should see /dev/sda, /dev/sdb etc all as unallocated drives. These are the drives you need to format.
Update the partition table to gpt and create a primary partition (whole disk):
parted /dev/sda
(parted) mklabel gpt
(parted) mkpart primary xfs 0 -0
(parted) quitThis should have now formatted the drive and created a primary XFS partition that stretches the entire size of the disk. Note: you don’t have to use XFS as the filesystem -- ext4 is also a good, widely used and supported choice.
Repeat this step for all drives that require formatting.
Mounting the disks
Now that the disks have been correctly formatted, you need to add records for each of them into the fstab. This will ensure that they are always mounted from and to the same place whenever the server is restarted. The best way to do this is to use each disk’s ID as a source for the mount. This is safer than using their /dev/sd* location as sometimes Ubuntu will register the disk to a different location on the next boot (this doesn’t always happen but it could).
List the drives you want to mount:
ls -la /dev/disk/by-id/The disks you’re interested in are the ones starting in ata- and ending in -part1. The listing also shows you their symlink destination so you can get a good idea of where they point to. In this case, we’re interested in the disks in Bays 1-4:
ata-WDC_WD30EZRX-00D8PB0_WD-WCC4N1175701-part1
ata-WDC_WD30EZRX-00D8PB0_WD-WMC4N0E19J8T-part1
ata-WDC_WD20EARS-00MVWB0_WD-WCAZA5929549-part1
ata-ST31000528AS_5VP2APPF-part1
Create some mount points for them:
sudo mkdir /mnt/disk1 /mnt/disk2 /mnt/disk3 /mnt/disk4Then add the entries for them into /etc/fstab:
/dev/disk/by-id/ata-WDC_WD30EZRX-00D8PB0_WD-WCC4N1175701-part1 /mnt/disk1 xfs defaults 0 2
/dev/disk/by-id/ata-WDC_WD30EZRX-00D8PB0_WD-WMC4N0E19J8T-part1 /mnt/disk2 xfs defaults 0 2
/dev/disk/by-id/ata-WDC_WD20EARS-00MVWB0_WD-WCAZA5929549-part1 /mnt/disk3 xfs defaults 0 2
/dev/disk/by-id/ata-ST31000528AS_5VP2APPF-part1 /mnt/disk4 xfs defaults 0 2
Once saved, you can mount the disks:
sudo mount -aThis will mount all disks configured on /etc/fstab.
Step 6: Software Installation
Well done if you’ve made it this far. Let’s recap!
The system has been built, the drives installed, and the OS is ready to go. Now you’re ready for the fun bit, turning a vanilla OS into a server. To do this we will need to install and configure software that will be running on your server. There are many things you can do with your server now it’s set up — almost limitless, in fact — but we will stick to a few of the basic functions. Below is a list of the kinds of services you might want to run:
- NFS – A lightweight file sharing protocol specifically designed for UNIX servers to share large files frequently. This is particularly well-suited if you plan on having multiple media clients around your home that want to receive media streams.
- Samba – A Windows network file share protocol designed to allow folder sharing over a Windows network. This is a great way to connect Windows profiles across multiple PCs in your home, and acts as a simple way to back up your documents.
- CUPS – A printer sharing protocol. Perfect if you have an old non-networked printer in your home that you want to put to use.
- Webmin – A web-based administration tool that gives you quick and easy access to particular tasks you may need to perform from time to time.
Hopefully this guide has helped you to set up your first home Linux server. There’s a large and interesting world out there and it’s your first step to some awesome home automation!